Get the Treasure - DIY Board Game
This game is not just a way to provide your kids (and yourself) with hours of an intense race for getting more treasure. It is also great for practising numeracy skills, learning how to use and read the ruler, colouring (my kids' least favourite activity), writing, and reading. But yes, the fun part is the most important. And the boys, Einstein E and Power P, really had a lot of fun playing.
Interesting facts about board games:
- Even simple games help young players identify colours, count spaces, and develop hand-eye coordination.
- The oldest board game known to have existed is Senet, found in Predynastical and First Dynasty burials of Egypt, c. 3500 BC and 3100 BC. Or, in kids vocabulary - the oldest board game was found in Egypt. Long long time ago.
Materials:
(for making)
- piece of cardboard
- ruler
- pencil, pen and/or coloured pencils
(for playing)
- counters
- die or spinner
Step 1.
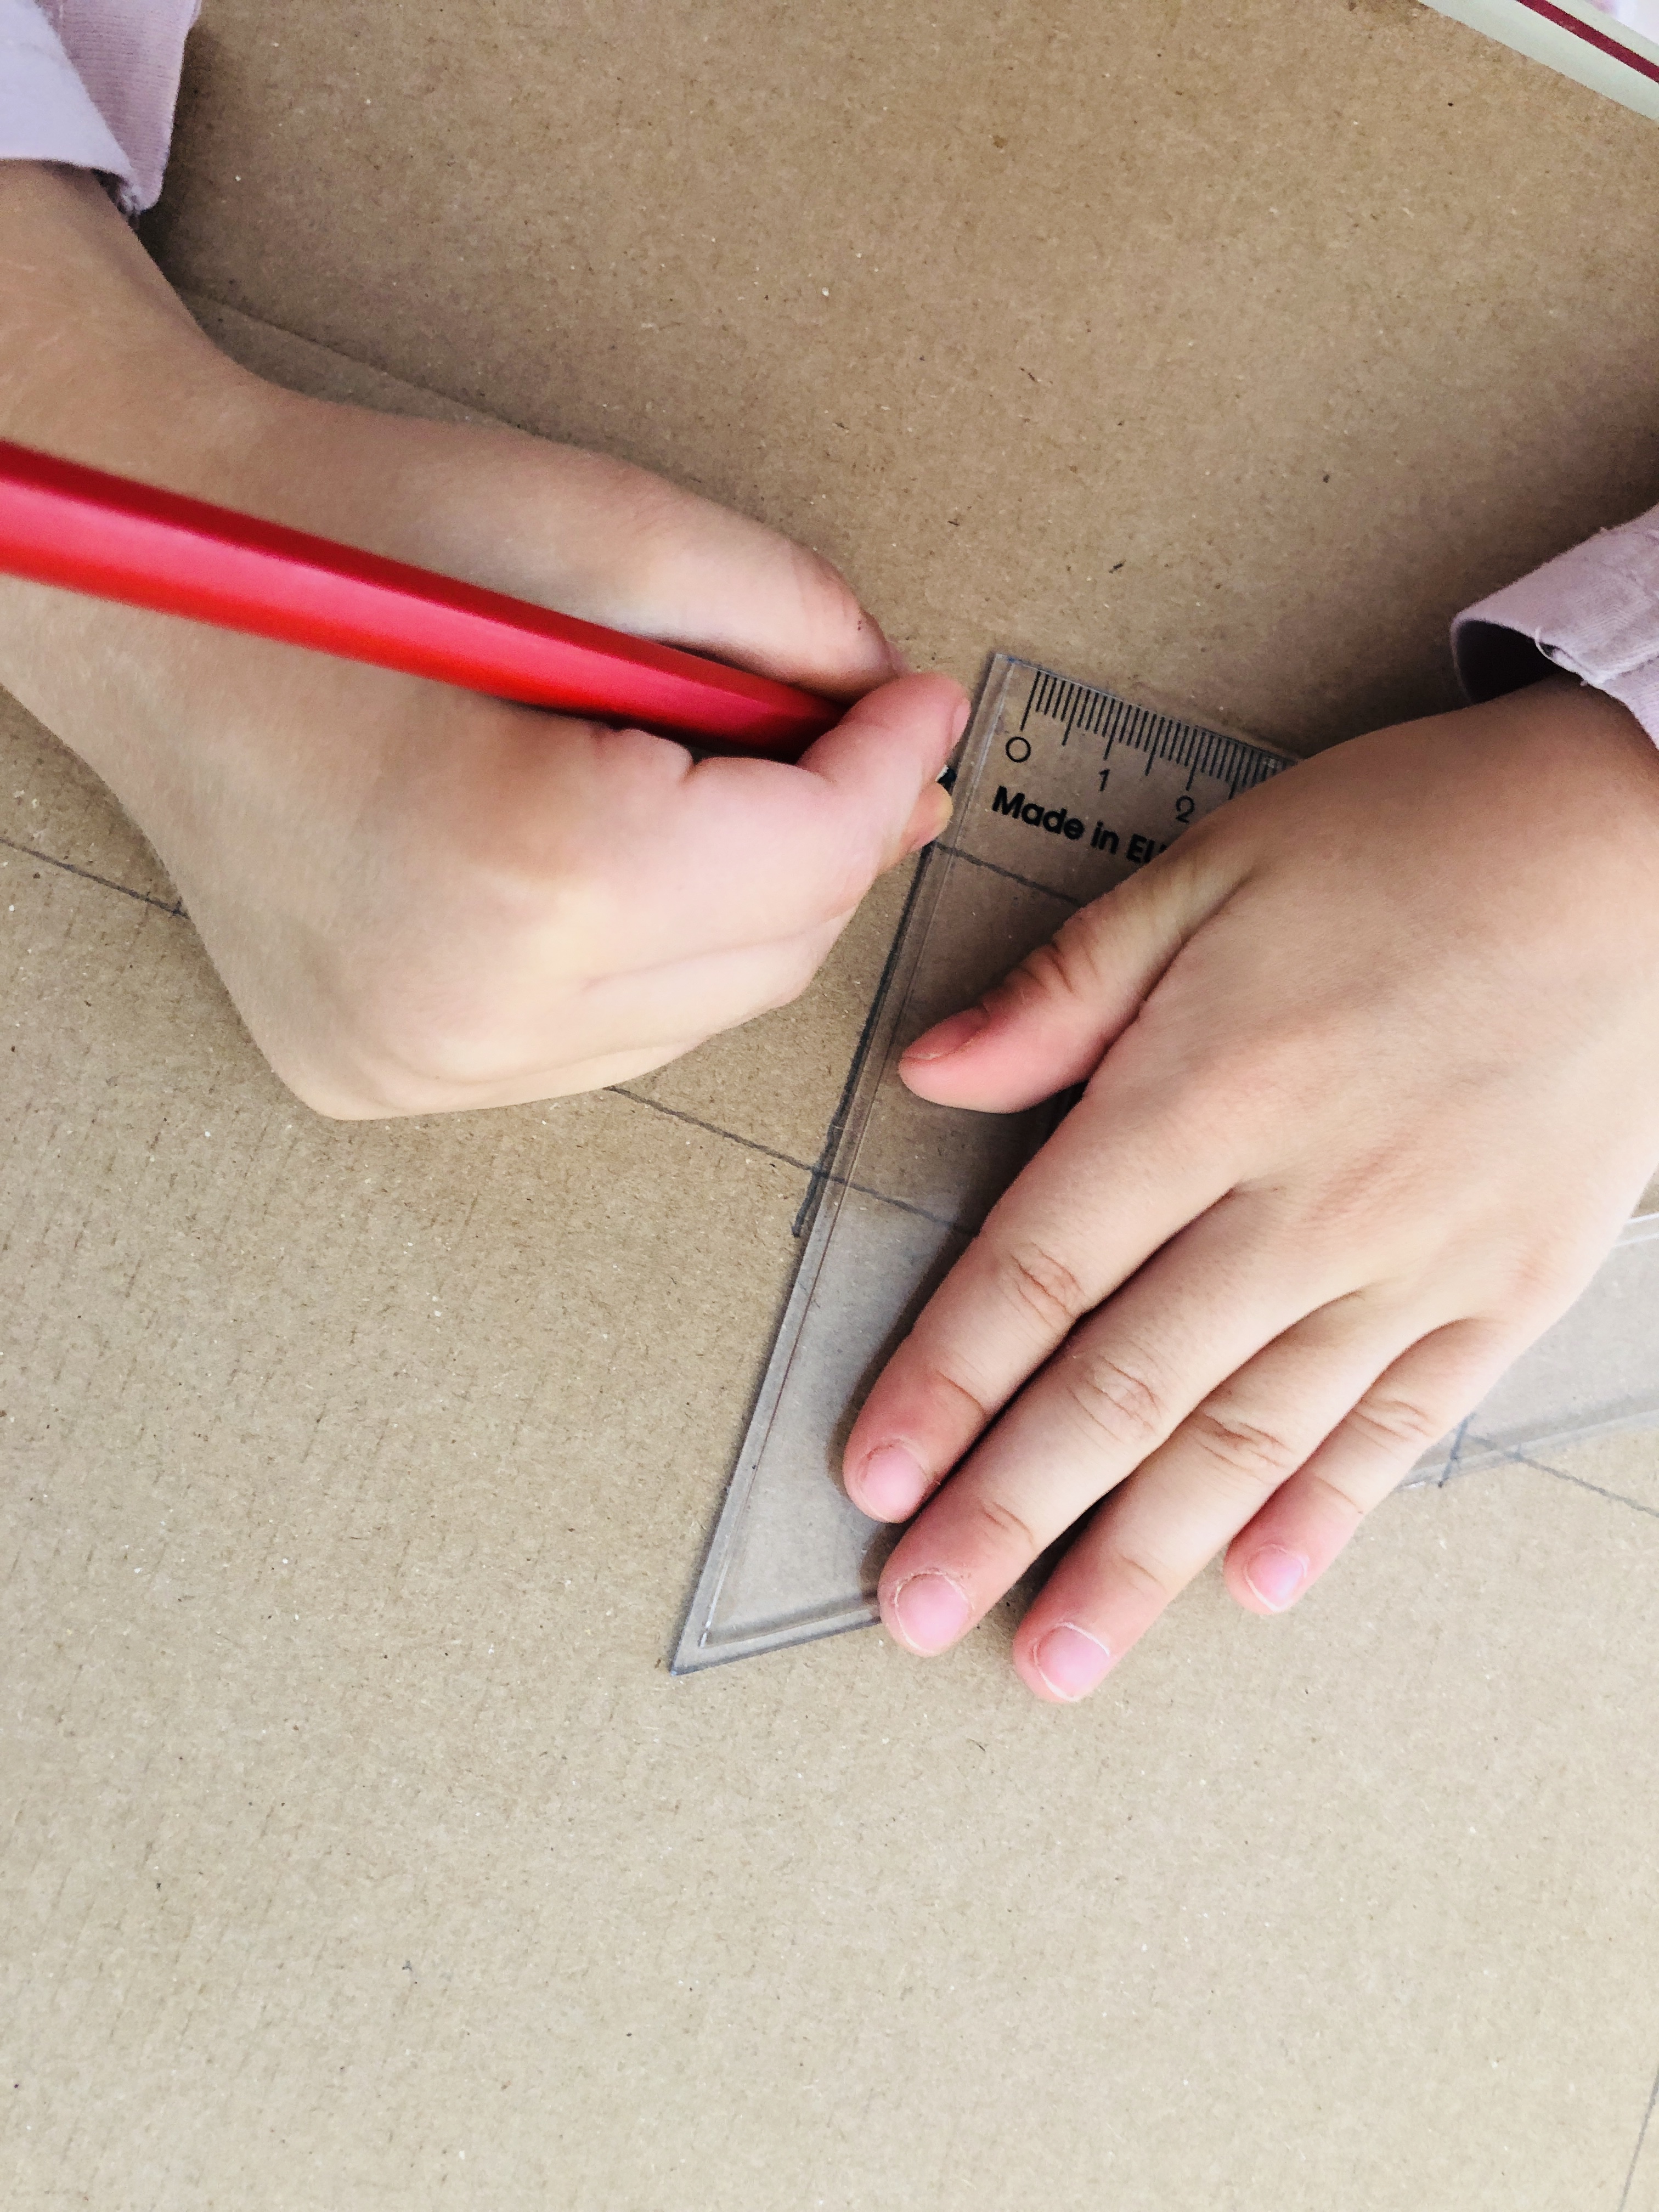
Outline a geometric shape. We made a rectangle, 36x20cm.
Step 2.
This is where the fun with numbers starts. Einstein E used the ruler to mark the spaces, each 4 cm long and wide. At first, he counted every centimetre. His counting looked something like this: Four and four is eight. Eight and one, two, three, four is twelve. Twelve and one, two, three, four is sixteen...
When he got to the second side of the rectangle, he was already very confident in marking the fields without counting every centimetre. By the time he got to the third, he had got his four-eight-twelve-sixteen counting automatised.
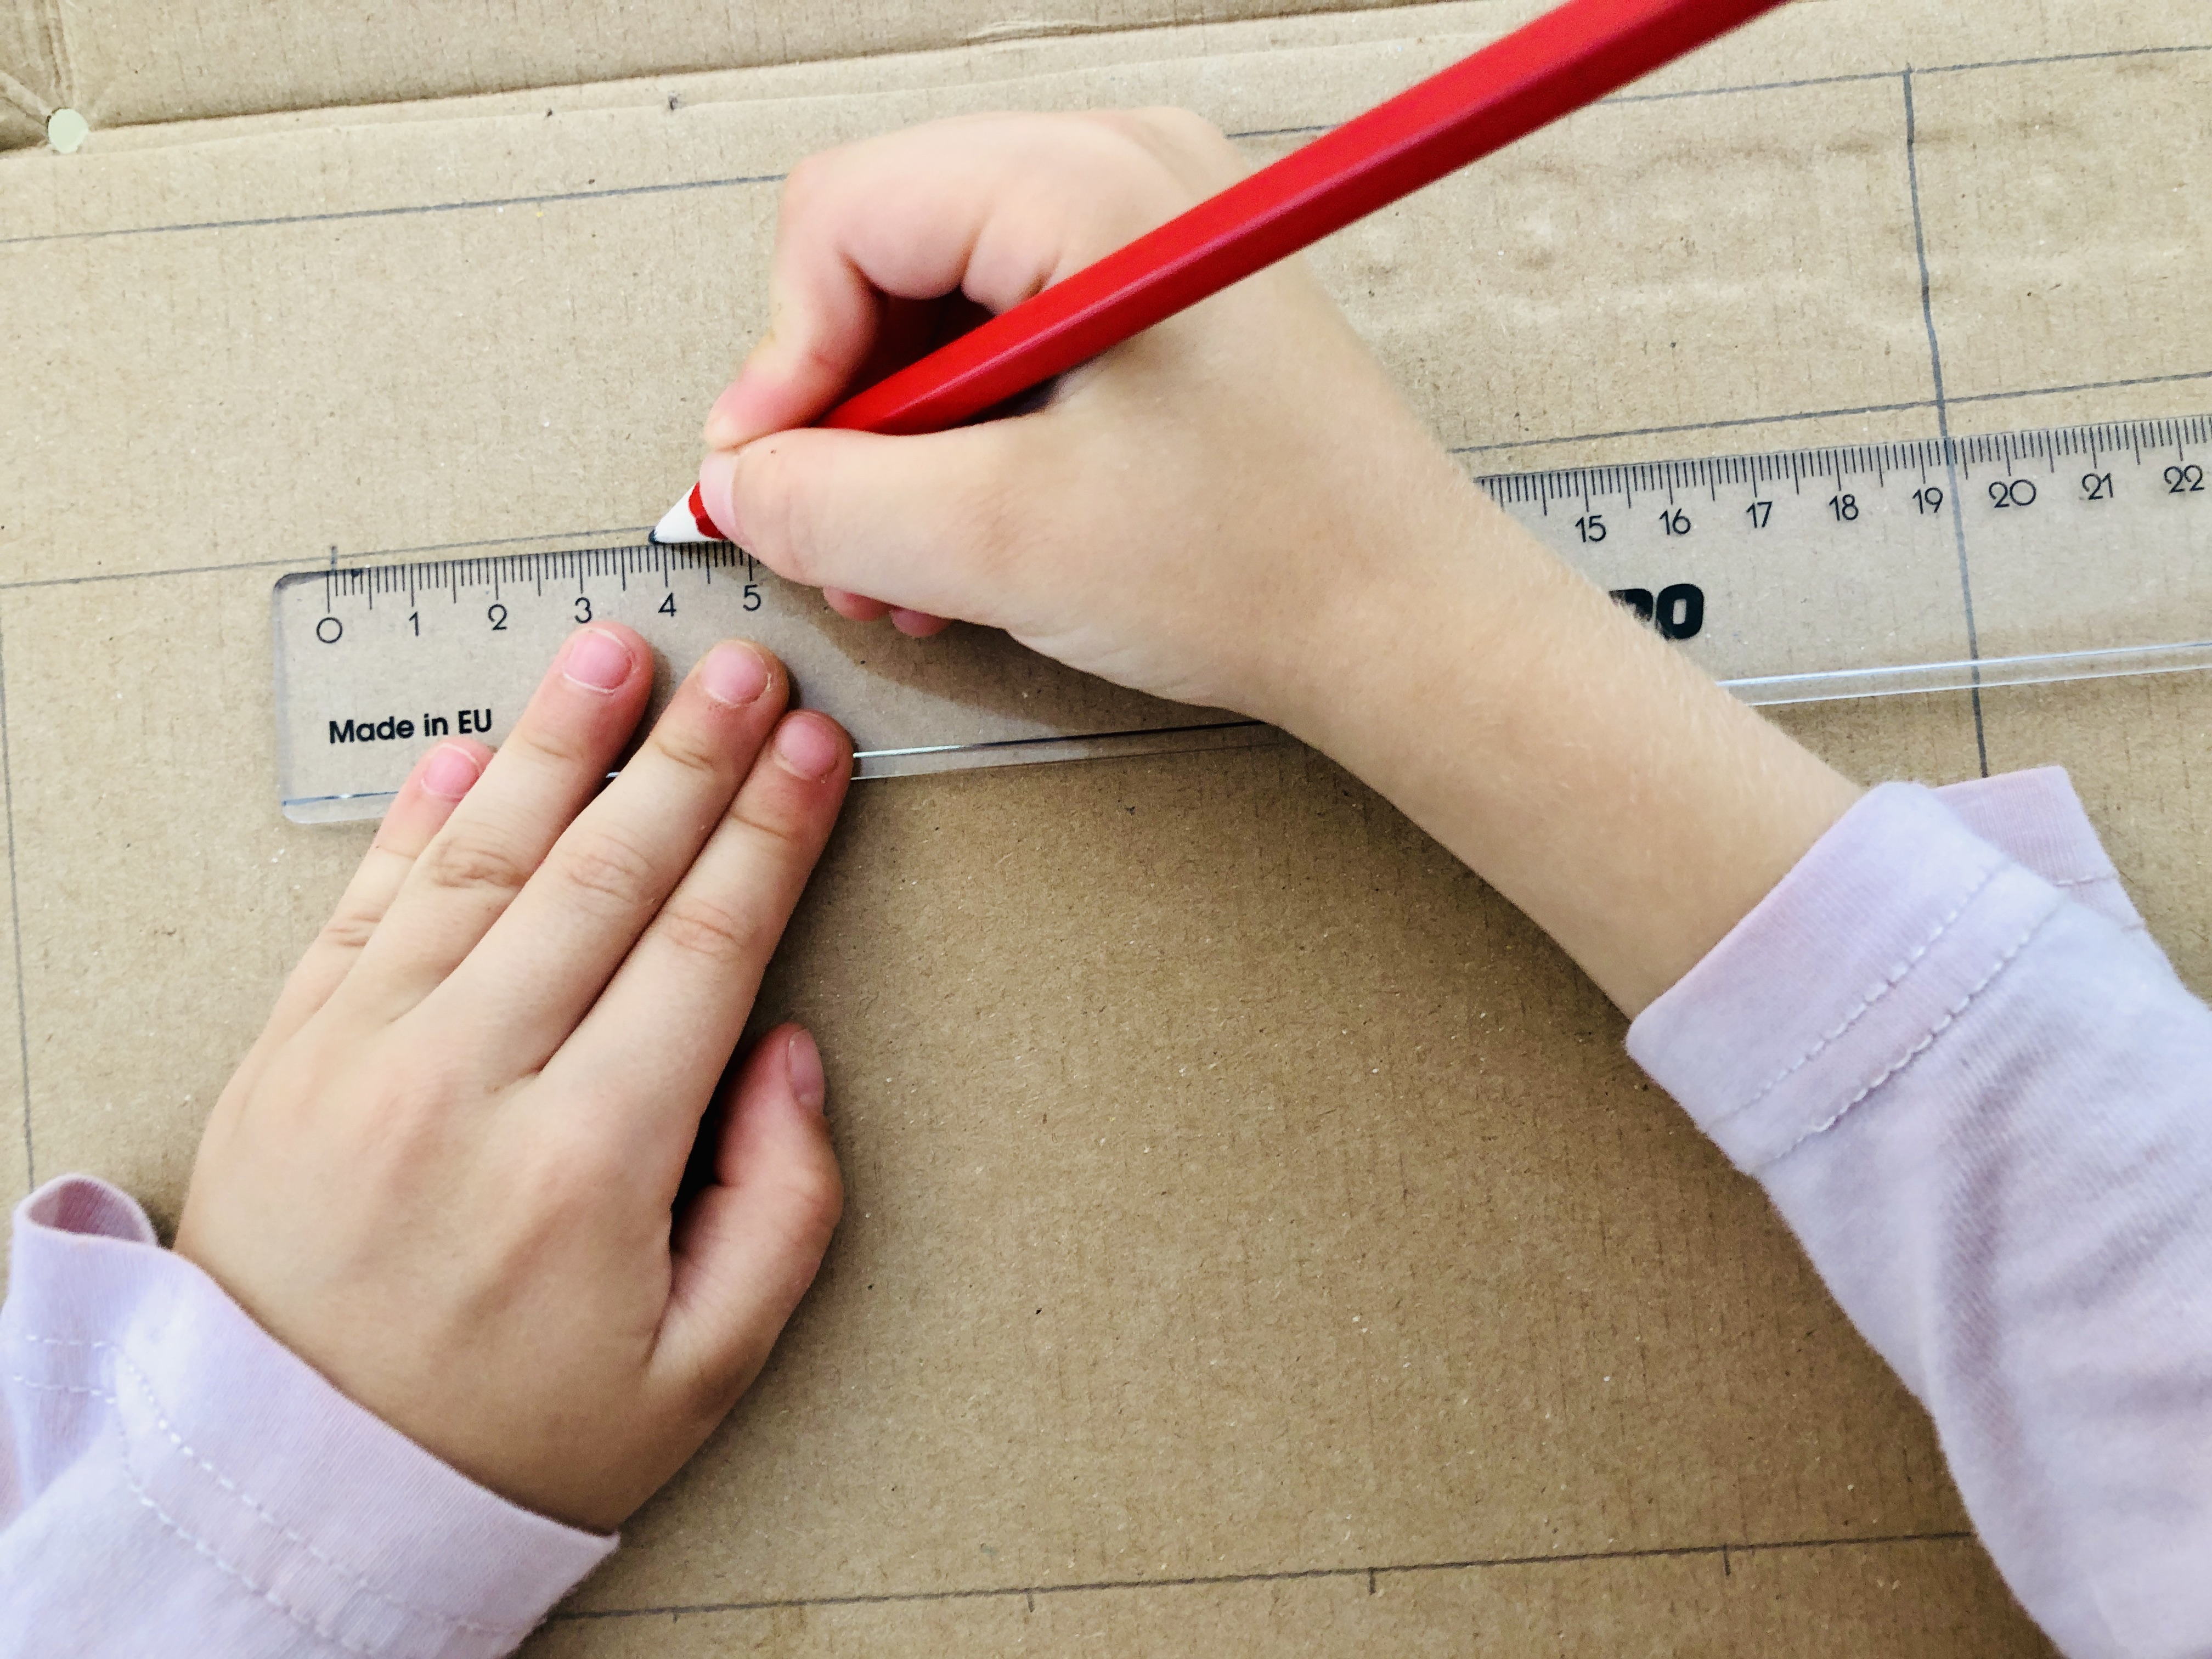
If your kid is interested in numbers and measuring, this is a great opportunity to introduce and explain units of length. This was not really my area. Luckily, their daddy is all about numbers so he had this part covered.
Step 3.
This step has to do less with reading and more with using the ruler. It was time to connect the marks and make the spaces.
Step 4.
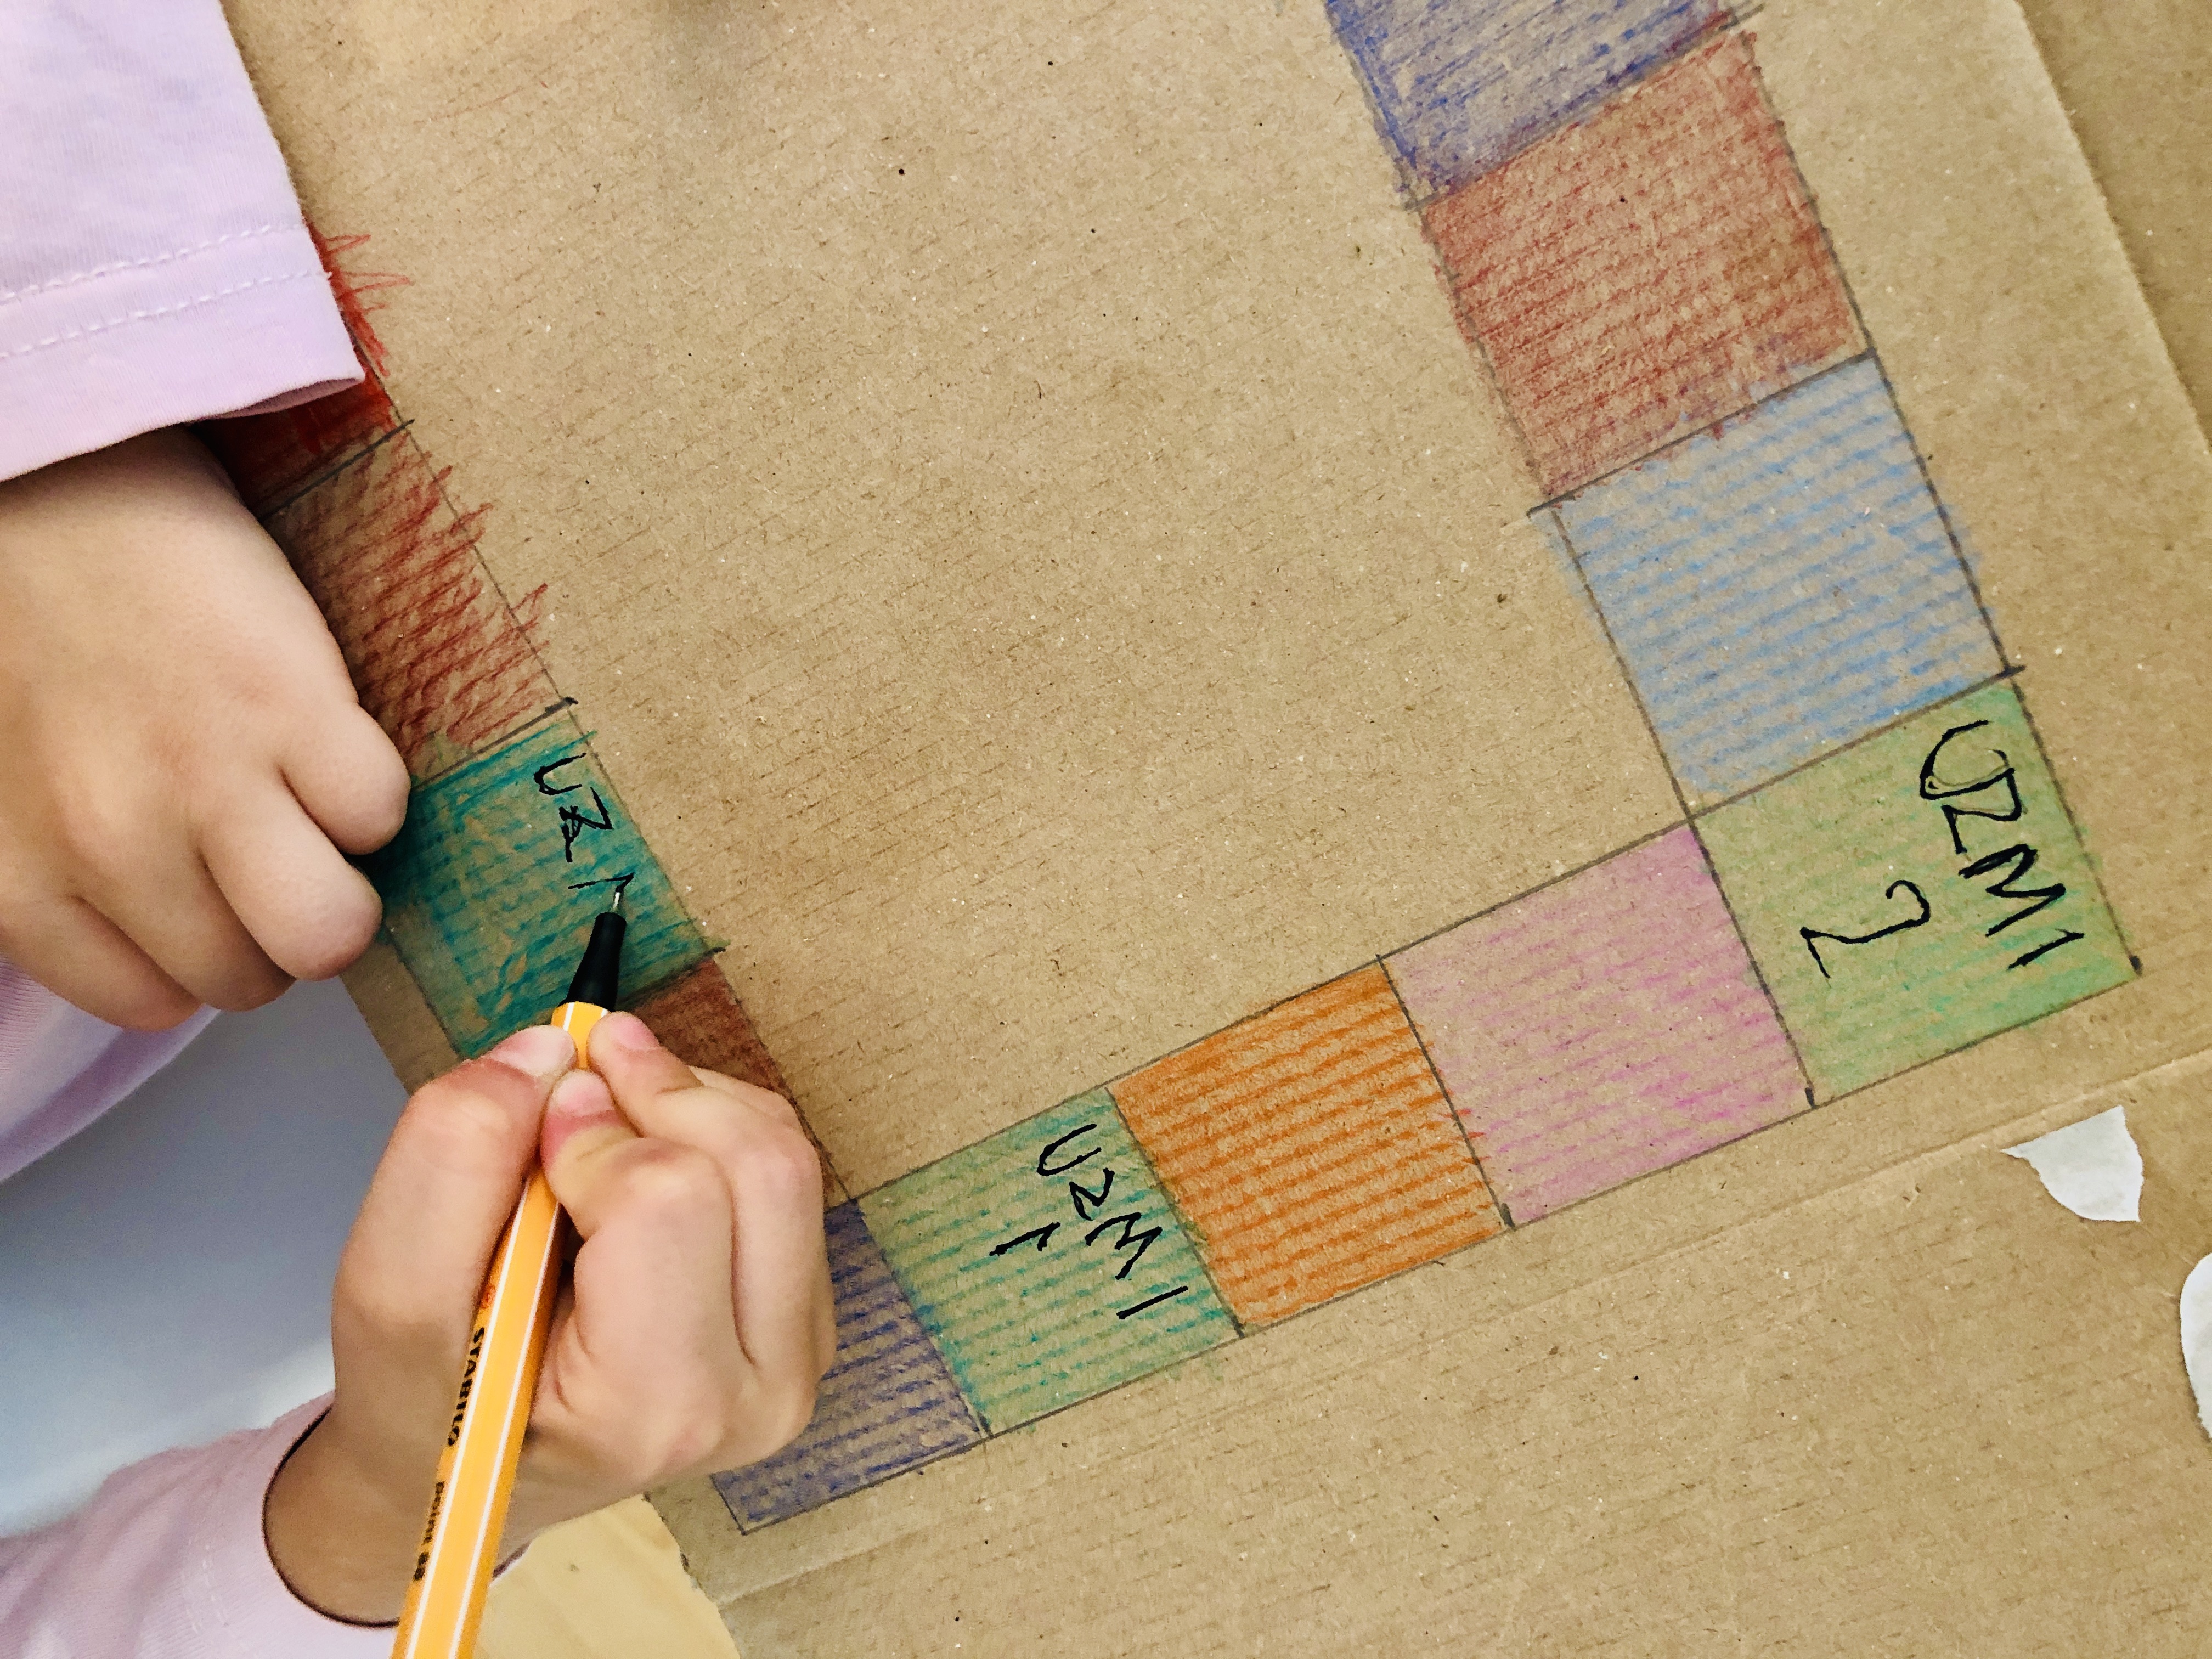
Both Einstein E and Power P love numbers and letter. Colouring, on the other hand, is something they avoid whenever possible. However, this was their board game and, after one of those motivational speeches about how colour makes games more interesting, they agreed to colour it.

Step 5.
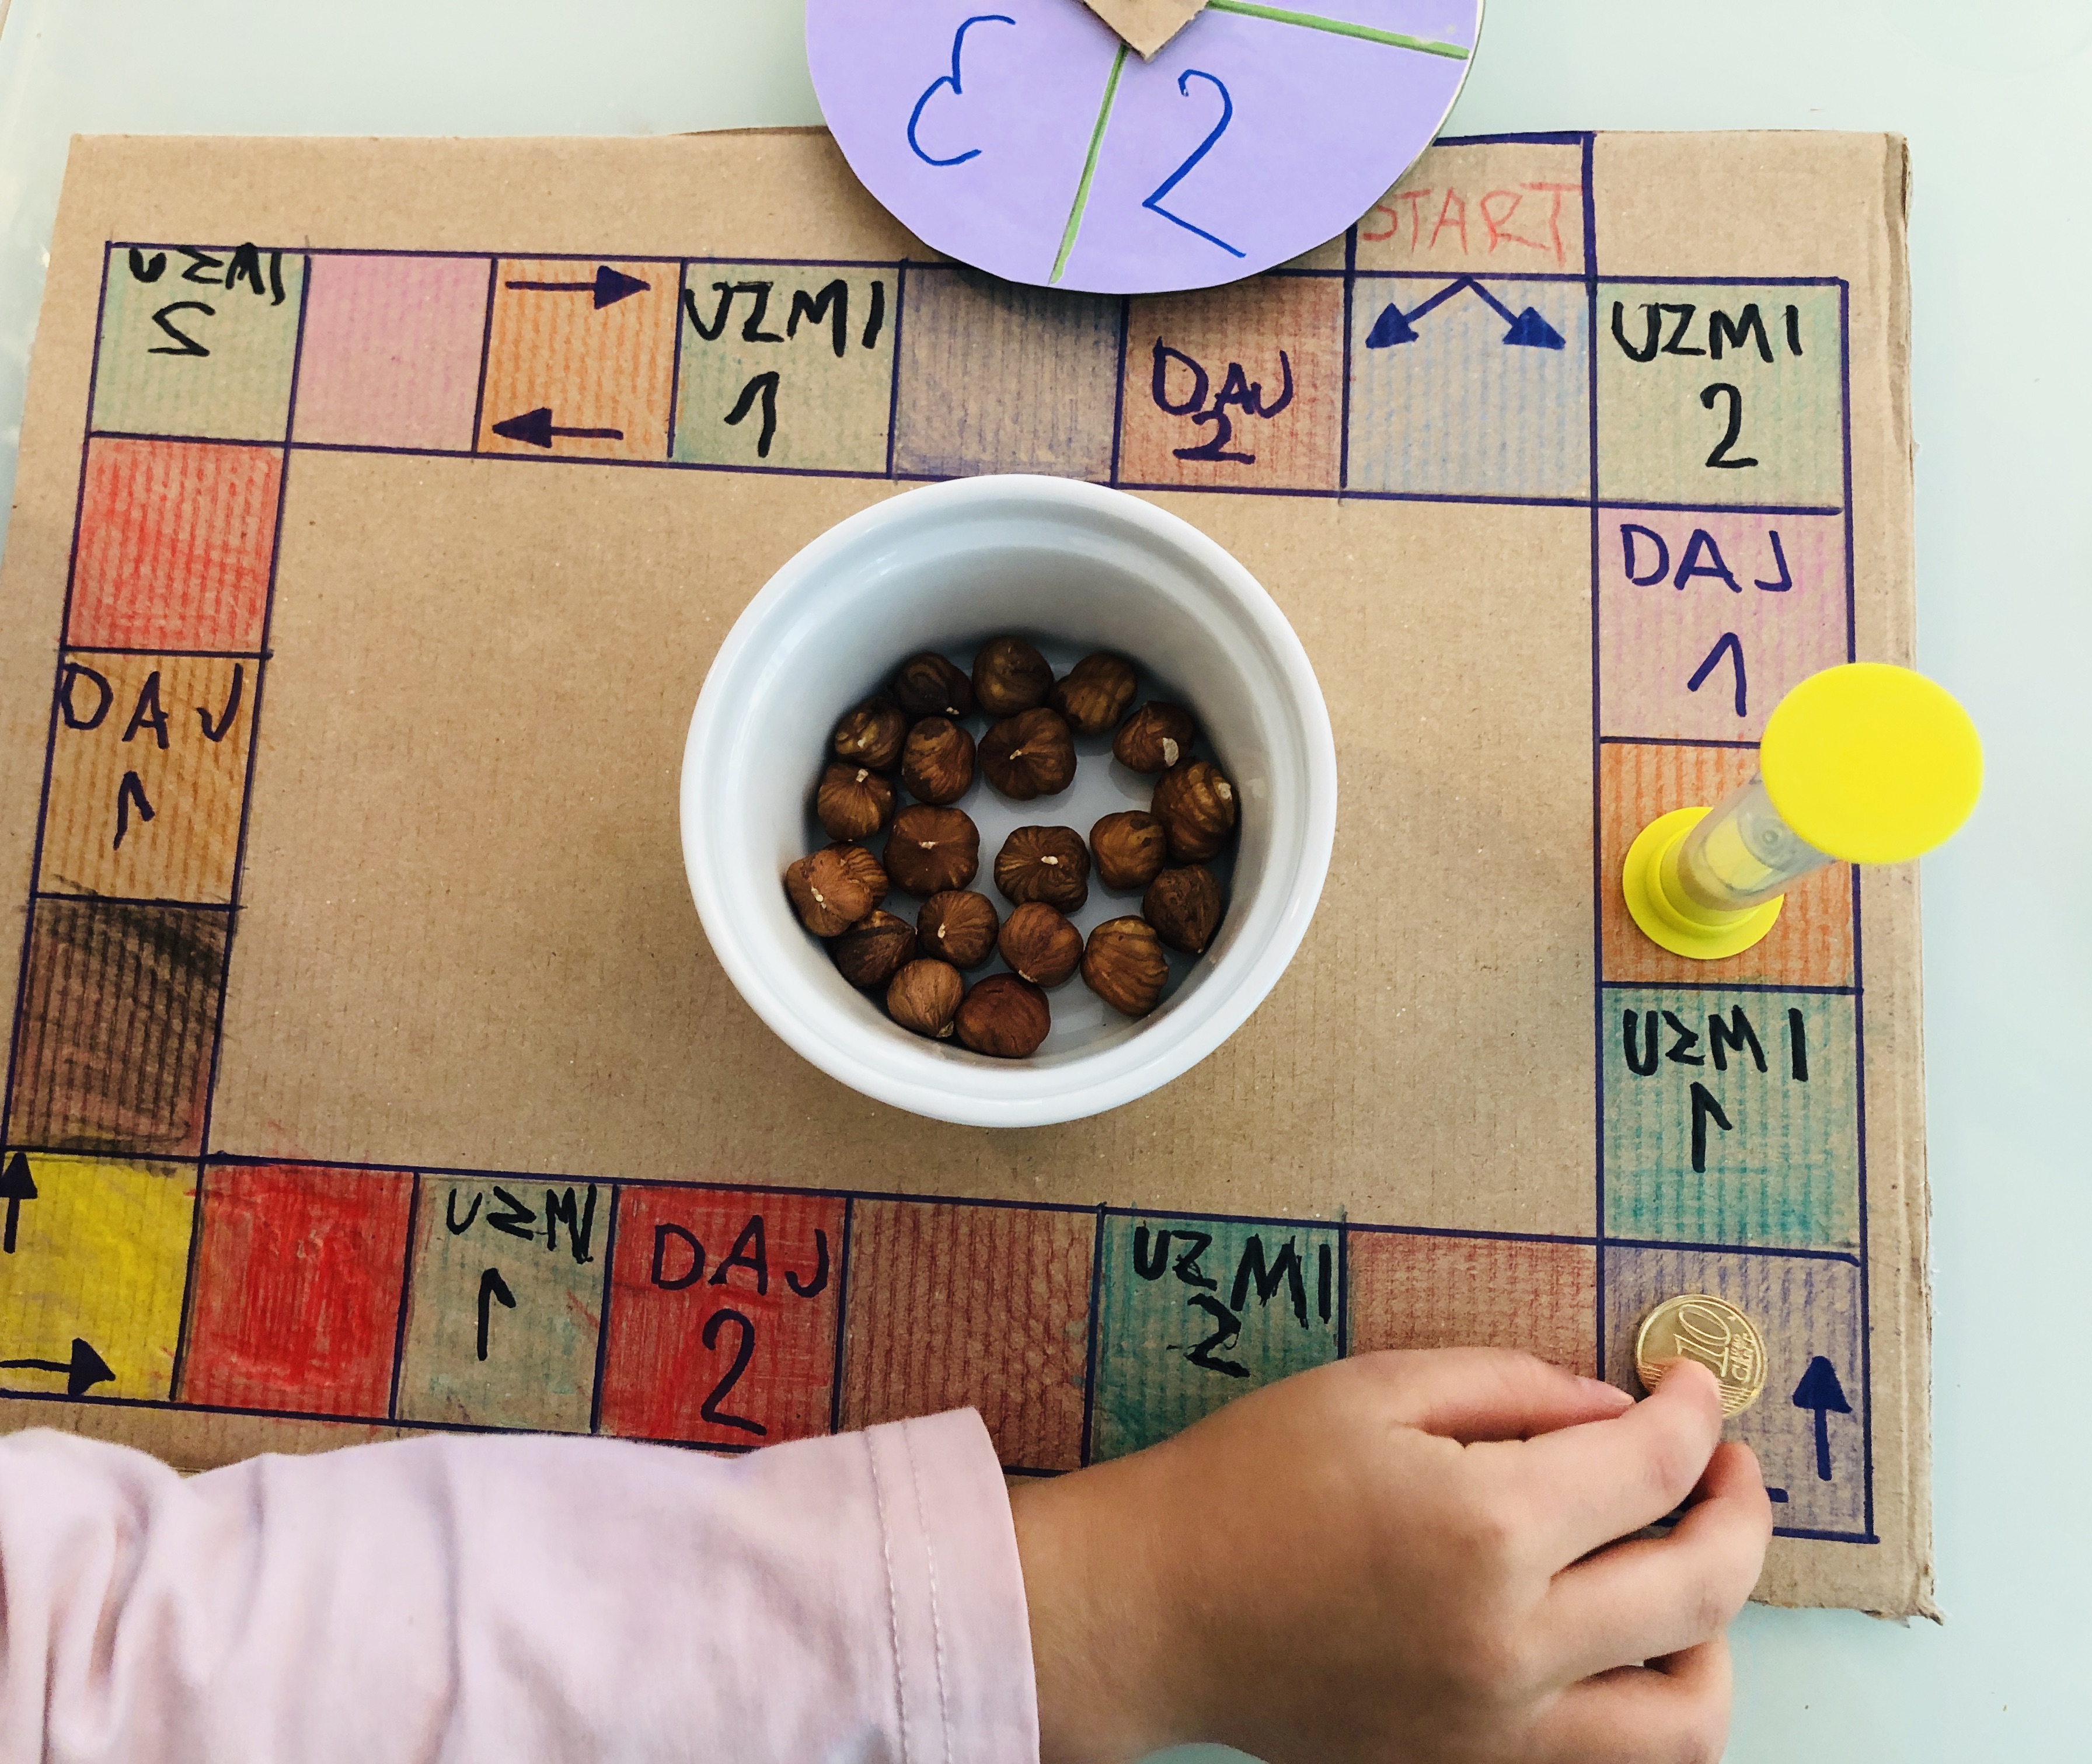
We agreed on the special spaces which included:
- take one
- take two
- give one
- give two
They wrote the instructions, and we added a few arrows as an option to change the direction - if a player wants to. This means that, when a players lands on a space with arrows, he can decide which direction he'll continue when he rolls again.
Step 6.
Get the treasure. The aim of the game is to collect more gems or pieces of treasure which are in the middle of the board. The winner is the player who has the most pieces after all of them have been taken. There is a "Start" space, but no "End" because the game continues for as long as there is some treasure.
Also, you can use a die or a spinner. For this game, we upcycled an old CD, bottle lid, and some cardboard, and made a spinner.
For the first round, we used hazelnuts as the treasure. I wouldn't recommend that, especially if your kid likes them.
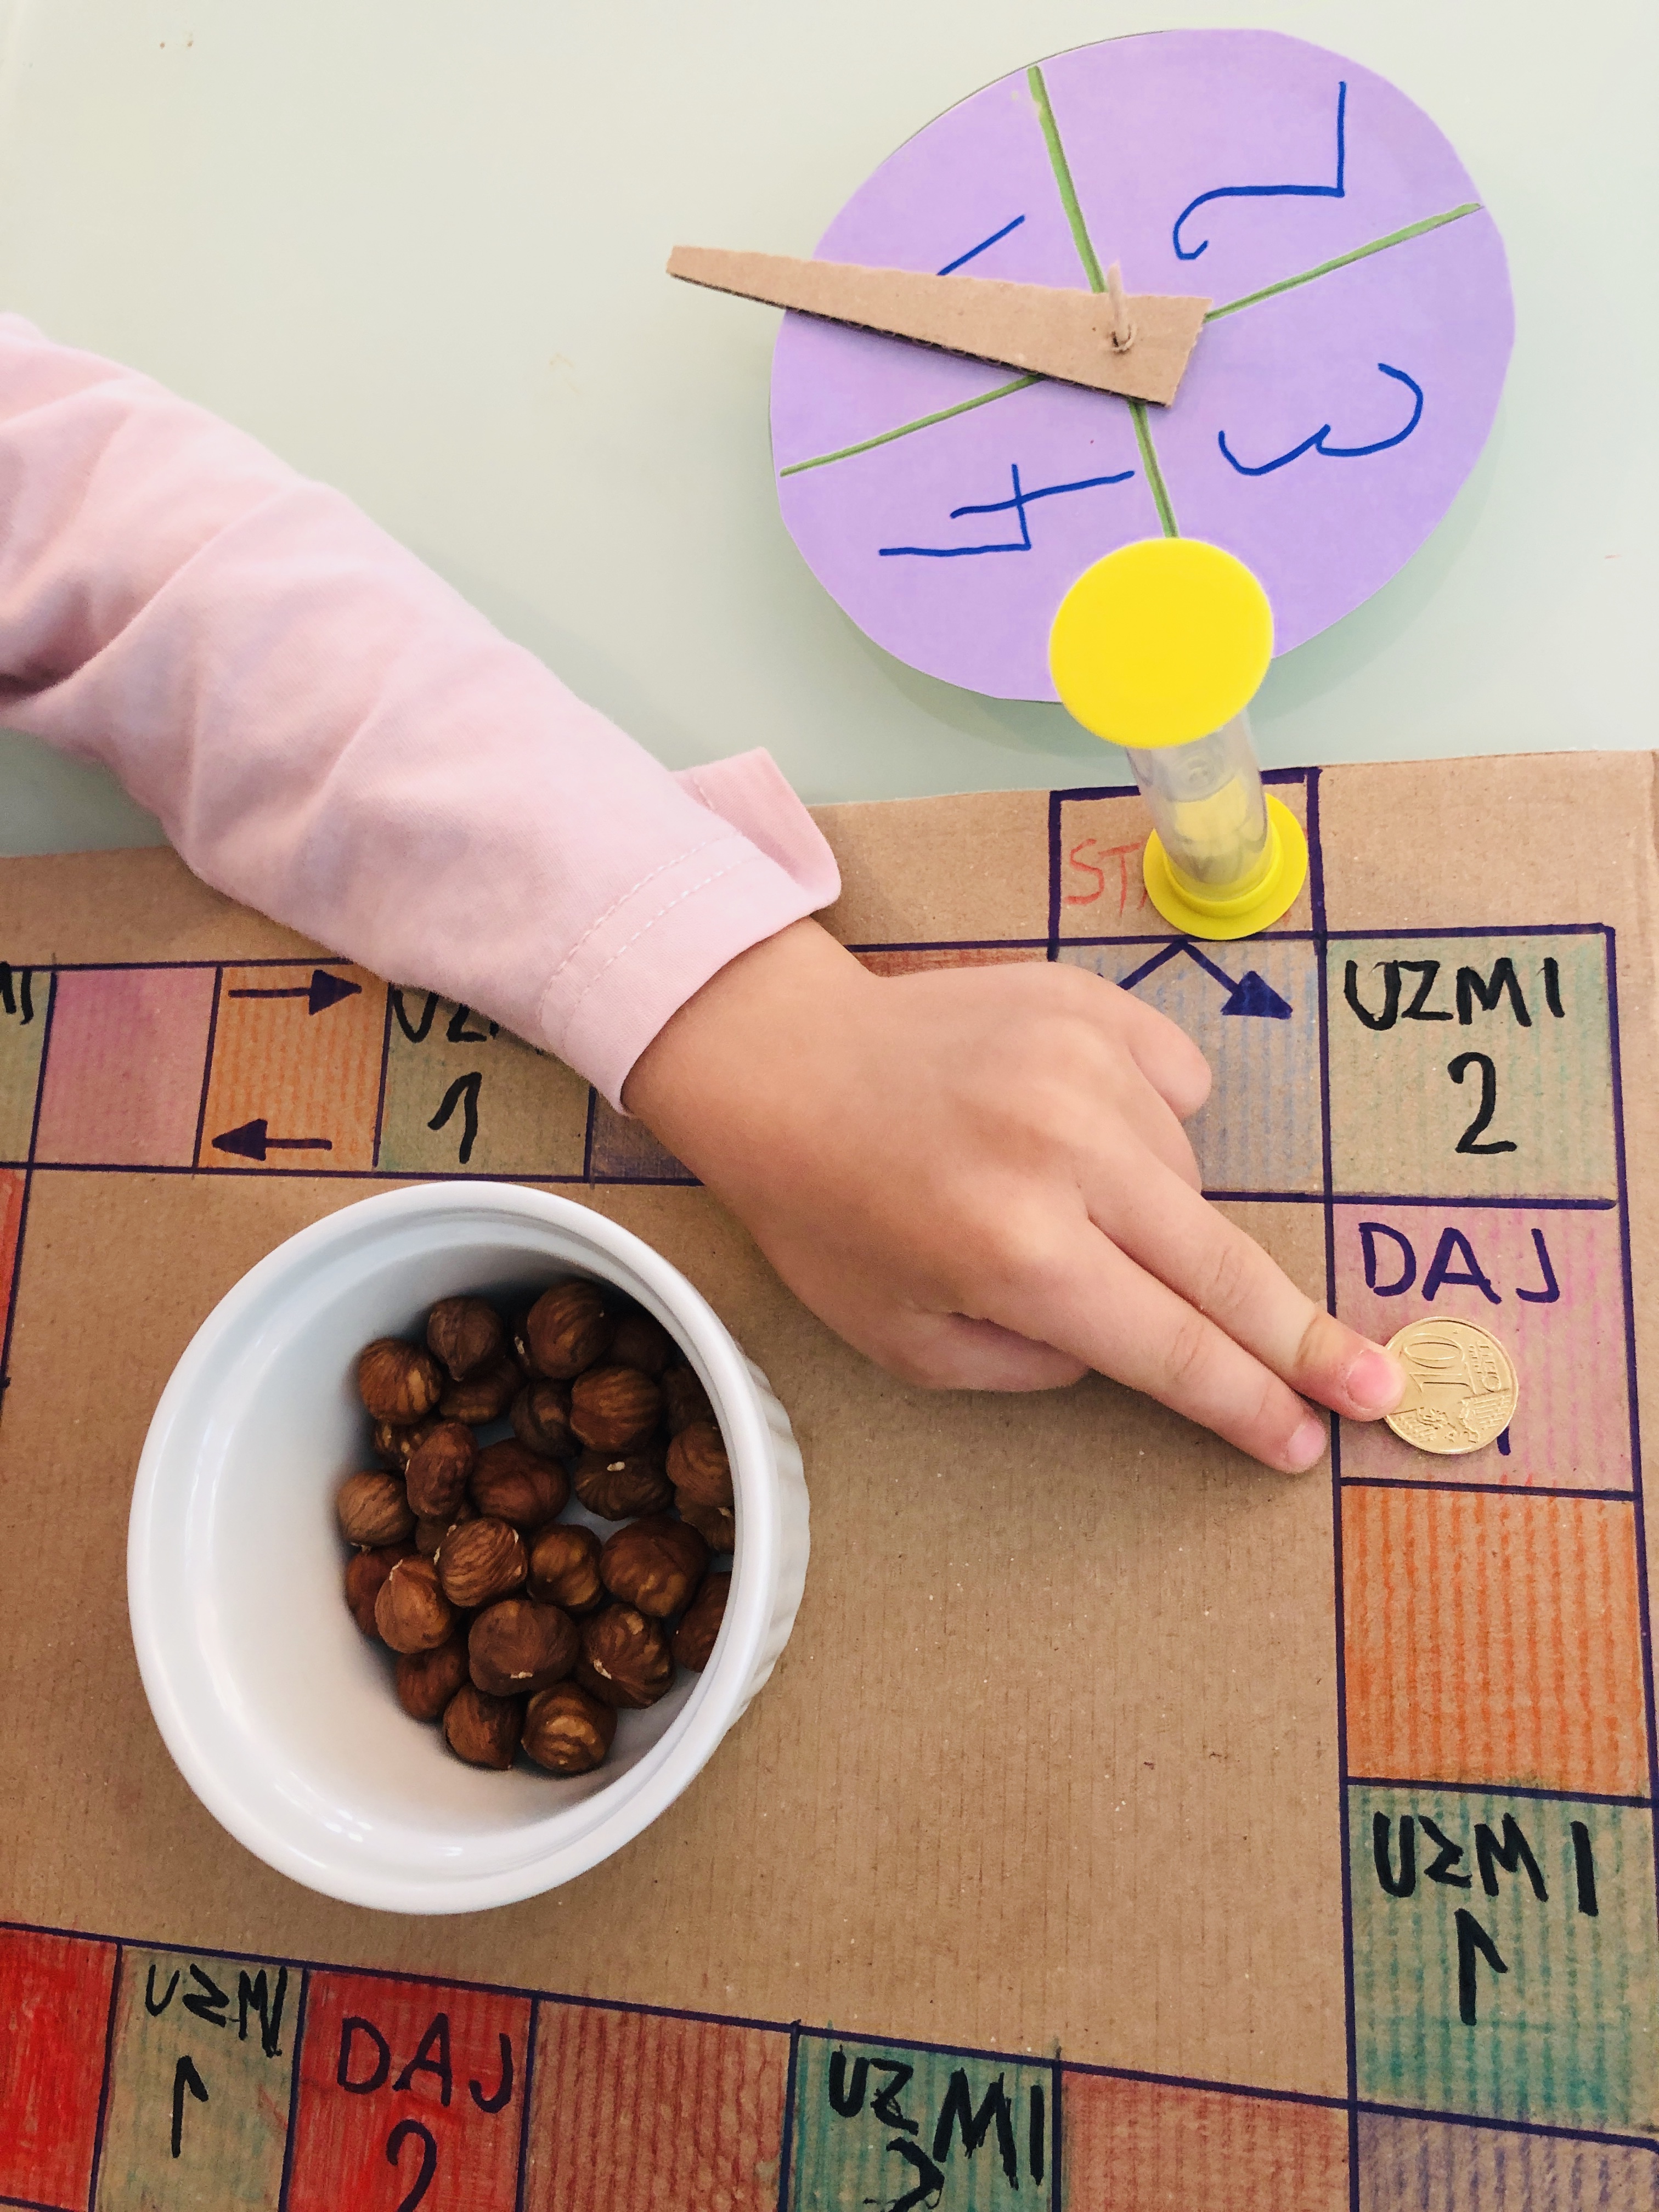
Then, we continued with small stones, beans, and Lego pieces.